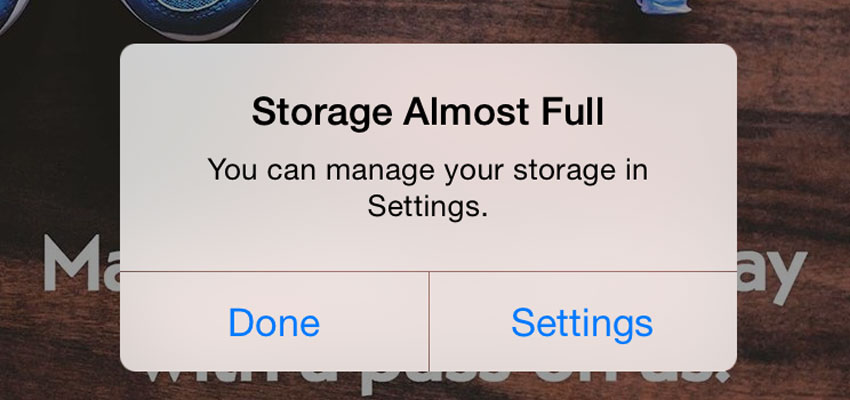
If your iPhone or iPad seems to be running slow or keeps crashing while running applications, you may be out of storage space and need to free up some room.
The recommended thing to do is to remove unused applications and delete unwanted photos and videos. If you have already done that, or you simply don’t want to remove any data off of your phone, there are other solutions. We see devices with storage issues almost daily at iRevive and we have a few recommendations on how to resolve them.
Process 1: Back up, Wipe, and Reinstall. (Computer Required)
!Make sure that you know your Apple ID and Password before continuing or else you will permanently lock yourself out of your device!
The most affordable method of freeing up space on your phone will cost you nothing but your time. This process involves backing up your device to a computer using iTunes, putting the phone in recovery mode, downloading the latest version of iOS, and reinstalling your phone. This process removes hidden data from previous installed versions of iOS and clears unwanted cached data. This will free up on average 5gb worth of unnecessary data.
1. Backing up your data
Using either a macOS or Windows computer, open up the iTunes application and plug your device into a USB port using a lightning cable. If you do not have iTunes installed, you can go download it from Apple’s website here https://www.apple.com/itunes/download. Once you have opened iTunes and connected your device, navigate to the top-left corner of iTunes where you should see an icon that resembles your device. In this example, I will be using my iPad.
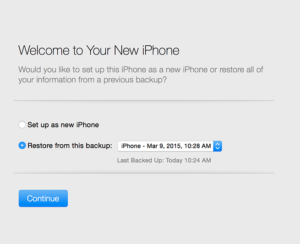
If at this point you have not previously plugged your device into iTunes before, you will see a screen asking if you would like to restore the phone or set up as new iPhone. Just continue as a new device. This will not erase your data. Let iTunes sync and back up your device.
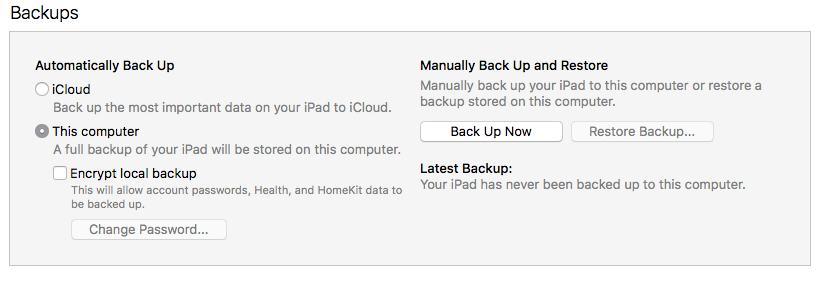
From here, you will see the summary page of your device. To save time, we want to change one setting. Underneath Backups, click “This Computer” rather than iCloud. This will save all of your device’s data on to your personal computer locally. It is crucial that you backup or data before you continue.
Select “Back Up Now” and let iTunes do its thing for a while. The process can take anywhere from 5 to 15 minutes depending on how much data you have. Once done you will see underneath “Latest Backup” todays date and time. Once verified that you see your data was backed up underneath “Latest Backup,” it is time to erase your device.
2. Putting your device in Recovery Mode
Make sure your device is still plugged in to your computer using a USB cable. Recovery mode will allow us to download the latest version of iOS from Apple and wipe your device completely. To get your device into recovery mode follow these steps
Have your device completely turned off.
Hold the Power and Home buttons on your device for 10 seconds. This will cause your phone to turn on and show the Apple logo and restart. The Apple Logo will disappear for a second indicating that the phone has restarted. (If you have an iPhone 7 or 7+, hold the Power, Home, and Volume down buttons.)
Once the device has the Apple logo appear the second time, let go of the Power button while continuing to hold the Home button until you see the iTunes logo appear.
3. Restoring your device (Erasing all Data)
!Make sure that you know your Apple ID and Password before continuing or else you will permanently lock yourself out of your device!
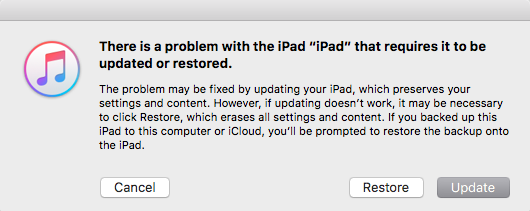
Once the iTunes logo has appeared, your device has entered Recovery Mode and iTunes will notify you with that your device has a problem and will need to be restored. Click “Restore.” This will erase all of your data off of your device permanently, but not to worry. You made sure you backed up your data before you began this step.
Next, iTunes will confirm that you do indeed want to restore your device, erasing all of it’s content and update to the latest version of iOS. Click “Restore and Update” to begin downloading the latest iOS version for your device. Depending on your internet download speed, this download process can take anywhere from 10 minutes to 2 hours.
Once the Download is complete, the process will automatically begin restoring your device. If you phone exited recovery mode or restarted, just simply follow the steps again for entering recovery mode once the download is complete.
4. Reinstalling your data from your backup
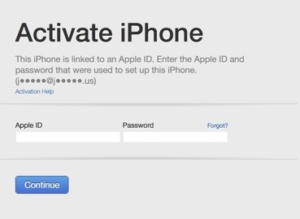
Once iTunes has completed restoring your phone, you will be brought back to a screen asking you to Activate your device by entering in your Apple ID and Password.
Once you have entered in your credentials, you will be brought back to the page we saw before asking if you would like to set up your device as a new device or restore from a previous back up. This time we ware going to click “Restore from Backup.” Select the backup you created with the most recent date and time.
Allow this step to run for awhile as it is reinstalling all of your personal data back on to your device. Once iTunes has completed restoring the iPhone or iPad from your backup, continue the set-up process on your device, eg. setting up a passcode and Siri.
Once you have completed the setup wizard, you will be brought to the home screen of your device where you will see your previous application being downloaded back on to your device. Remain connected to WiFi while your phone completes downloading all of your applications back on to your device. After you have downloaded all of your apps back, you are completed!
Your device should now have more available space for taking more selfies and installing your favorite games!
Process 2: Backing up your data using a Flash Drive
If you do not have access to a computer or you do not feel comfortable backing up and erasing your device yourself, you can always purchase a portable flash drive for your iOS device.
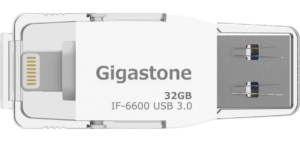
This is a newer technology many manufactures have started producing. It is a USB Flash Drive with a lightning connector on one side so you can plug your iPhone or iPad up and store your data on this device. We started carrying this specific brand in stock for customers who didn’t have access to a computer.
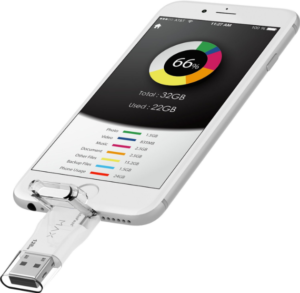
This brand, Gigastone, makes flash drives between 16gb and 126gb and uses an app from the AppStore which allows you to individually select what data you would like to back up, or back up your entire phone data all together.These devices do not increase the max storage capacity of your iPhone of iPad, however they are great for people who don’t have access to a computer and want remove photos and videos from their device without permanently deleting them.
If you iPhone of iPad seems to be running slow or keeps crashing applications, you may be out of storage space and need to free up some room.

